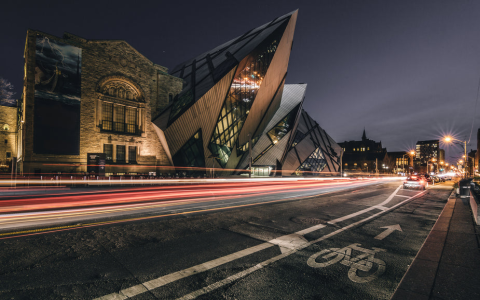
Well, if you’re lookin’ to get them fancy long exposure traffic pictures, it ain’t as hard as it sounds, I promise ya. Just takes a little know-how and some good ol’ patience, just like waitin’ for the rain to stop when you’re hangin’ out the wash. Now, let’s talk about how you can catch them pretty light trails on the road, so when folks see your picture, they’ll be sayin’, ‘How’d you do that?!’
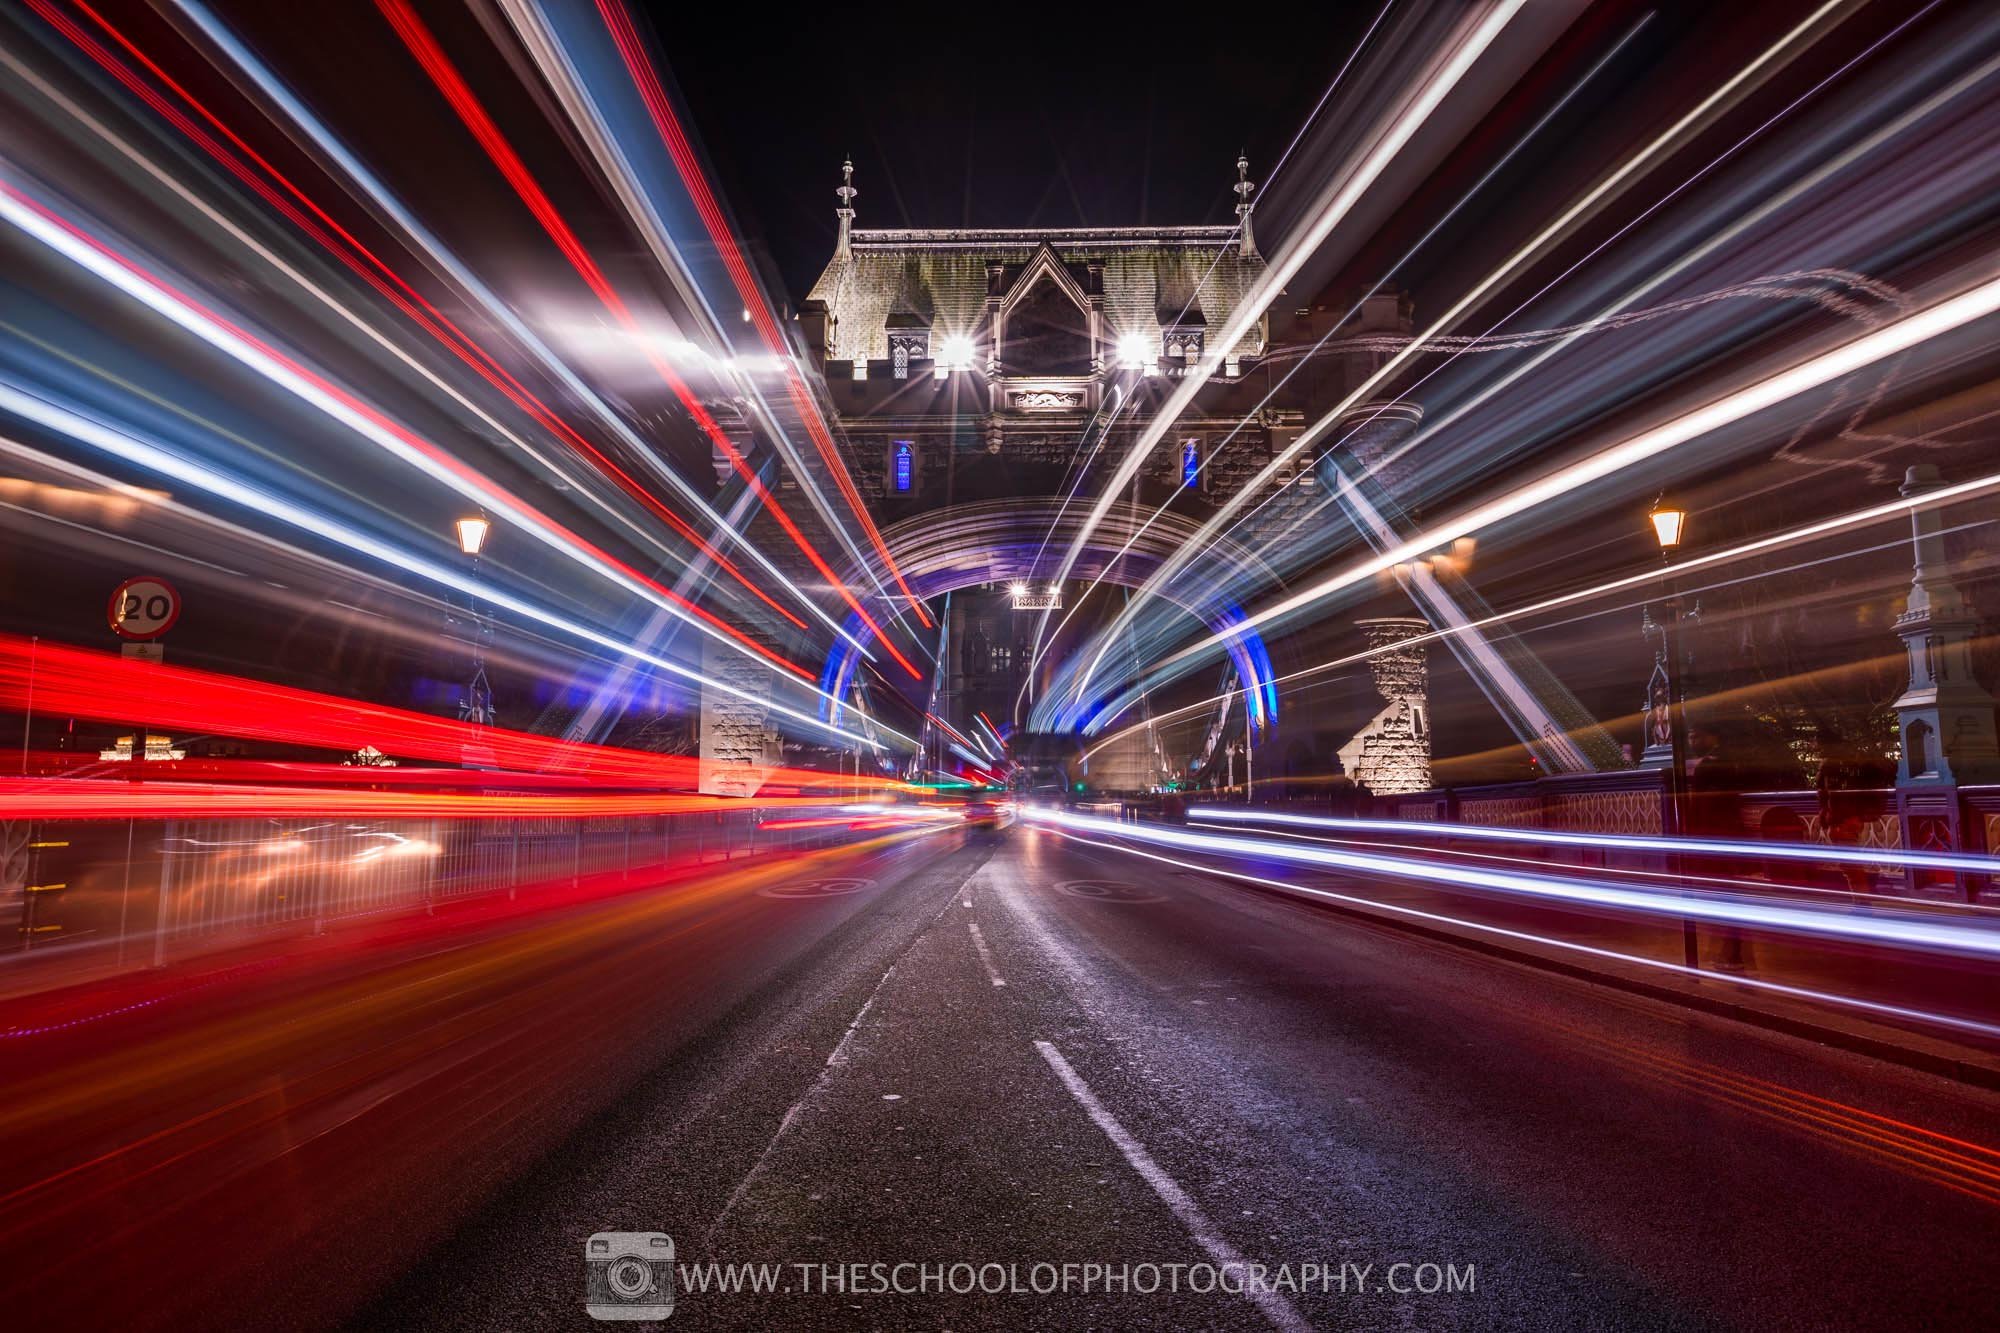
First thing you gotta know is, this ain’t about takin’ a quick snap like you would with a regular photo. No, no, this here’s about takin’ your time. You need a camera with a good ol’ long shutter. That means you’re lettin’ in more light for a longer time, so those car lights will leave pretty streaks across your photo, like a trail of fireflies in the night.
Now, to get them trails lookin’ just right, you need to set that camera up proper. Don’t just point and shoot! Start by settin’ the ISO to around 800. Not too high or it’ll make your picture all grainy-like, but 800’s just fine for catchin’ them car lights. You also need a slower shutter speed, the slower, the better. A good place to start is with a 1-second shutter, or even 10 seconds if you’re feelin’ brave. That’s gonna give the camera enough time to gather all that light from them cars zoomin’ by.
Important tip: You want to keep your aperture nice and wide too, like a big ol’ open door, so the light can flood in. A f/8 aperture is usually a good place to start. Too small and your trails won’t show up like you want ’em to. Too big, and everything gets too blurry, like a foggy morning.
Now, let me tell ya about the gear you need. You ain’t gonna get good long exposure shots without a sturdy tripod. If you don’t have one, you’re in trouble. You need to make sure that camera ain’t movin’ around while the shutter’s open. Even a tiny bit of shake can mess up your whole picture, and we ain’t tryin’ to make blurry messes, are we?
Another thing you need to think about is where you’re shootin’. It’s better to be somewhere with lots of traffic, like a busy road or a crosswalk. The more cars there are, the more light trails you’ll catch. But, remember, don’t pick a place where folks are speedin’ by too fast. We want nice, smooth trails, not a bunch of jagged lines that look like someone’s hand slipped.
Once you get all your settings right, it’s time to take the shot. Set your camera up, press the shutter button, and just wait. You’ll see them light trails start to form. If you’ve done it right, the car lights will look like ribbons of color streaking through the dark. It’s kind of like painting with light, don’t ya think?
But here’s the thing—don’t rush it. Take your time. If you don’t like the first one, try again! That’s the beauty of long exposure photography—it’s all about trial and error. It ain’t like regular pictures where everything’s gotta be perfect from the get-go. Nah, this is about experimentin’ and gettin’ the feel of it. You might have to fiddle with the ISO, the shutter speed, or the aperture a little, but you’ll get there.
Don’t forget: You can also play around with the type of light. Car headlights make them nice, bright streaks, but tail lights give you red trails. You could even catch a bus or a bike with lights on it if you’re real lucky. Just think about the kind of light you want to show in your picture and plan accordingly.
Now, when you’re takin’ them pictures, be mindful of the background. You don’t want a messy background that distracts from them pretty light trails. Look for places with clean, simple backgrounds. Maybe a dark building, or a quiet street. Too much light behind the trails and you might end up with a cluttered shot, like when you throw too many clothes in the wash and they don’t come out clean.
And, here’s a little trick that might help: if you have a camera with a remote or a timer, use it. That way, you won’t shake the camera when you press the button. You’ll get a nice, clear shot every time.
All in all, long exposure photography is a lot of fun once you get the hang of it. It’s like makin’ magic with your camera. So, next time you’re out and about, look for them lights and get creative! You just might end up with a picture that makes folks stop and stare.
Now go ahead and give it a try! With a little patience and practice, you’ll be shootin’ them long exposure traffic trails like a pro in no time. And don’t worry if it don’t turn out perfect the first time—you can always try again, just like the first time you tried to bake a pie!
Tags:[Long Exposure Photography, Traffic Trail Photography, Light Trail Photography, Shutter Speed, ISO Settings, Camera Aperture, Photography Tips, Time Exposure Photography, Cityscape Photography]