Hi, dear photography enthusiasts! I’m Fange. I’ve been exploring the wonderful world of photography for many years. Today, I’d like to have an in-depth chat with you about portrait photography, which is a field full of charm and challenges. Portrait photography is like a conversation with the soul. Through the lens, we capture the instant charm of people and freeze their unique personalities and emotions into eternal images. In this article, I’ll share with you all the portrait photography skills I’ve accumulated over the years without reservation, hoping to help you take amazing works in this field.
I. Building Trust and Communication with the Subject
1. Pre-shoot Communication
- Before the shooting, get in touch with the subject via phone, email or social media. Briefly introduce the purpose, style and process of the shooting, understand their expectations and concerns, and relieve their nervousness. For example, when I was taking portraits for a soon-to-graduate college student, during our phone conversation, he mentioned that he hoped to show his vision and confidence for the future. Based on his idea, I initially planned to shoot in the campus library and playground, etc., and explained in detail to him the shooting intention of each scene, so that he had a clear understanding of the shooting and thus felt less uneasy.
- Ask about the subject’s hobbies, occupation, life experiences, etc., so that you can find common topics during the shooting process and enhance mutual familiarity. When I was photographing a fitness coach, knowing that he loved outdoor sports, I shared my own mountain climbing experiences with him, which instantly narrowed the distance between us.
2. On-site Interaction during Shooting
- At the beginning of the meeting, greet the subject with a warm and friendly attitude, communicate the shooting plan in detail again, and give them sufficient opportunities to express their opinions and ask questions. For example, when I was taking business portraits for an enterprise executive, I patiently listened to his special requirements for the use and style of the photos, and made slight adjustments to the shooting details according to his feedback.
- During the shooting process, keep talking with the subject, praise the excellent aspects of their performance, and guide them to relax and show their personalities naturally. For example, tell some light-hearted and humorous short stories or share some interesting anecdotes during the shooting to keep the atmosphere pleasant. Once when I was photographing a young artist, I told him a funny story about a sudden inspiration in artistic creation, which made him laugh heartily, and I successfully captured his natural and vivid smile.
II. Precise Control of Light Application
1. Utilization of Natural Light
- Understand the characteristics of natural light at different times. The light in the morning and evening is soft and warm in color, which is suitable for creating a warm and emotional portrait atmosphere. When shooting, let the subject face the direction of the light source, use side light or backlight to outline the contour of the person, and use a reflector to fill in the facial shadows and highlight the three-dimensional sense of the person. When I took commemorative portraits for a couple by the sea, I chose the evening. The golden sunset shone on them. I used side backlight to highlight their contours and a silver reflector to fill in the light, making their faces clear and full of layers, and the photos were full of romantic charm.
- The diffused light on cloudy days is uniform and soft, which can delicately present the texture of the person’s skin and avoid strong shadows, and is suitable for shooting fresh and elegant style portraits. You can choose to shoot in the area near the window or with a large area of soft light, and also use a reflector to adjust the light balance. When I took indoor portraits for a literary young woman, it happened to be a cloudy day. I asked her to sit near the window. The soft light shone on her. I only used a white foam board to slightly fill in the light and took pictures that were fresh, natural and just like the girl next door.
2. Artificial Light Setup
- Single-light Lighting: Use a flash or a continuous light with soft light accessories such as soft light covers or umbrellas to create a simple and dramatic effect. For example, place the light at about 45 degrees above the subject to form the Rembrandt lighting effect, illuminating most of the face area and creating a triangular shadow on the other side of the cheek, increasing the depth and layering of the person. When I took promotional portraits for a drama actor, I used the single-light Rembrandt lighting effect to highlight the lines on his face and his deep eyes, perfectly showing his unique charm on the stage.
- Multiple-light Combination: Through the combination of main light, fill light, background light and rim light, etc., create rich and diverse light effects. The main light determines the overall light direction and intensity, the fill light is used to fill in the shadows, the background light highlights the background layers, and the rim light outlines the edge of the person to separate them from the background. For example, when shooting fashion portraits, you can use strong background light and rim light to create a cool and fashionable visual effect. When I took magazine cover portraits for a fashion model, I used the main light to illuminate the model from the front, the fill light to slightly fill in the light below to reduce shadows, and the strong blue background light and white rim light made the model stand out in the picture, full of fashion sense and a sense of the future.
III. Skillful Composition to Shape the Picture
1. Application of Classic Composition Rules
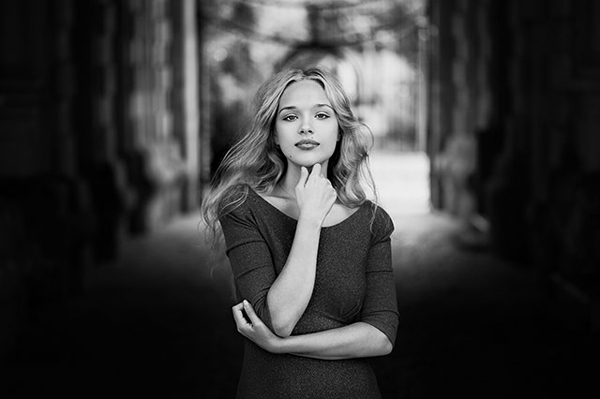
- The Rule of Thirds: Divide the picture into a nine-grid, and place the key parts such as the eyes of the subject on the intersection points of the four dividing lines. This can make the picture more balanced and harmonious and guide the viewer’s eyes to focus on the main subject. When I took a portrait of an old man, I placed his deep eyes on the intersection points of the Rule of Thirds. The background of the picture was an ancient courtyard. The person and the environment complemented each other, and the whole photo looked harmonious and full of charm.
- Center Composition: Place the main subject in the center of the picture, which is suitable for highlighting the expression, demeanor or specific details of the person, creating a solemn and stable visual feeling, and is often used in taking ID photos or close-up portraits. For example, when taking a close-up portrait of a newborn baby, placing the cute little face of the baby in the center of the picture makes the pure eyes and pink skin of the baby the focus of the picture, which attracts people’s attention at a glance.
2. Composition of the Relationship between the Environment and the Person
- Incorporating Environmental Elements: According to the shooting theme and the emotion you want to express, choose the appropriate environmental background and combine it with the person. For example, when photographing an artist, you can place him in his studio, surrounded by his works and creative tools, showing his professional characteristics and artistic atmosphere; when photographing a traveler, you can choose to shoot in front of the local characteristic scenery to highlight the person’s travel experiences and exploration spirit. When I took a portrait of a painter, I placed him in a studio full of paintings and paints. He stood in front of an unfinished work, holding a paintbrush in his hand, and the picture vividly showed his artistic world.
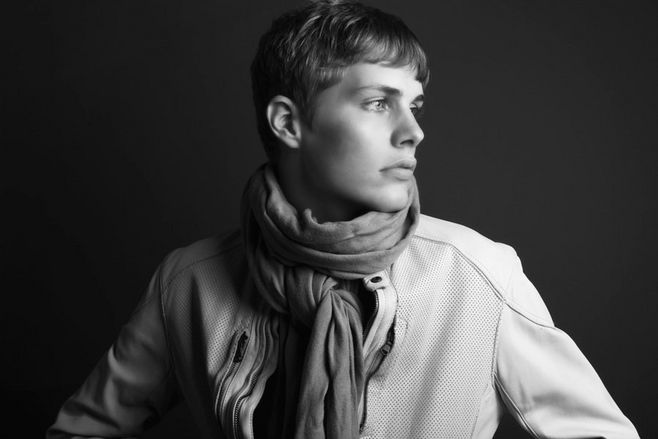
- Blank Space Composition: Reserve a certain blank area in the picture. The simple background can highlight the main subject, leaving more imagination space for the viewers and making the portrait works more artistic and full of artistic conception. For example, when shooting a profile portrait of a person, leave more blank space on the side where the person is facing, so that the viewers’ attention will be focused on the contour and expression of the person. When I took a profile portrait of a dancer, the left side of the picture was left blank. The graceful body curve and focused expression of the dancer were more eye-catching under the simple background, as if telling a silent dance story.
IV. Guiding the Subject to Show Emotions and Personalities
1. Expression Guidance
- Start with a Smile: Let the subject try a natural smile first, and then gradually guide them to show different expressions according to the shooting style, such as a big happy smile, a reserved smile, a slightly melancholy look, etc. You can inspire sincere smiles by recalling pleasant experiences or telling funny jokes, or guide the subject to think about some emotional topics, such as longing, dreams, etc., to show expressions full of depth. When I took a portrait of an entrepreneur, I asked him to recall the hardships and perseverance in the early stage of starting a business. Naturally, a firm and persistent look appeared in his eyes, and successfully injected emotional power into the photo.
- Eye Contact: Remind the subject to maintain eye contact with the lens. The eyes are an important window for conveying emotions and personalities. Encourage them to show different eye characteristics such as firmness, gentleness, curiosity, etc., and attract the viewers into the story of the picture through their eyes. For example, when shooting a business person, guide them to show confident and focused eyes, reflecting their professional image. When I took a portrait of a teacher, I guided her to look at the lens with gentle and expectant eyes, which well conveyed her love and expectation for the students.
2. Posture and Movement Design
- Full-length Portrait Postures: Design appropriate standing or sitting postures according to the body proportions and clothing styles of the person. When standing, let the subject slightly separate his feet, with the body weight on one foot and the other foot relaxed naturally. The hands can hang down naturally or do some simple actions, such as putting them in pockets or folding arms, showing a confident and comfortable posture. When sitting, pay attention to keeping the back straight and the legs placed gracefully, avoiding hunchback or stiff postures. When I took a full-length portrait of a fashion model wearing a long dress, I asked her to stand in an elegant posture, slightly turn sideways, and gently lift the hem of the dress with one hand, showing the beauty of the dress and her confident temperament.
- Half-length and Close-up Postures: Half-length portraits focus on the posture of the upper body and the movements of the hands. The hands can gently touch the face, tidy the hair, hold props, etc., adding vividness and story-telling to the picture. Close-up portraits mainly focus on facial expressions and local details, such as eyes, lips, etc. At this time, the subject’s posture should be kept as stable as possible to ensure that the face is clear and sharp. When I took a half-length portrait of a musician, I asked him to hold a violin in his hand, with his fingers gently placed on the strings, slightly bowing his head, as if immersed in the creation of music, and the picture was full of artistic atmosphere.
V. Paying Attention to Post-processing Details
1. Color Adjustment
- Overall Tone Control: Determine the overall tone of the picture according to the shooting theme and the emotional atmosphere you want to convey. For example, when shooting retro-style portraits, you can use warm yellow tones to create a nostalgic atmosphere; when shooting modern and fashionable portraits, you can choose cold tones or high-contrast color styles to enhance the visual impact. Adjust the color temperature, hue, saturation and other parameters to achieve precise control of the color. When processing a set of retro-style portraits, I increased the color temperature, adjusted the hue to yellow, and appropriately reduced the saturation, making the photos present a nostalgic and elegant atmosphere, as if taking the viewers back to the good old days.
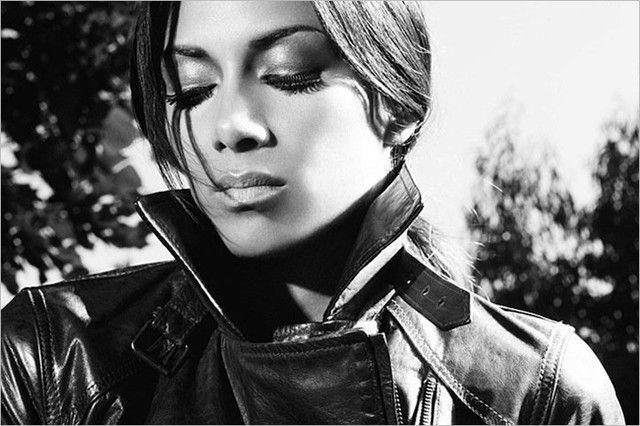
- Skin Tone Correction: Ensuring that the skin tone of the person is natural and healthy is a key link in portrait post-processing. Avoid making the skin tone too red, too yellow or too pale. According to the actual skin tone of the subject and the light conditions, use tools such as color balance and optional colors to make detailed adjustments to the skin tone, while paying attention to retaining the texture and details of the skin. When processing the portrait of an Asian woman, because the light was yellowish during shooting, which made the skin tone yellowish, I used the color balance tool to appropriately reduce the yellow and add a little red to make the skin tone look more natural and ruddy. At the same time, I used the skin smoothing tool for a slight treatment to retain the delicate texture of the skin.
2. Flaw Removal and Detail Enhancement
- Flaw Removal: Use tools such as the Healing Brush Tool and the Clone Stamp Tool to remove blemishes such as pimples, spots and wrinkles on the person’s face, but pay attention to maintaining the texture and authenticity of the skin and avoid over-modifying to make the person look like plastic. When processing the portrait of a young actor, I carefully removed several pimples on his face with the Healing Brush Tool, while retaining some tiny freckles on his face, making him look clean, fresh and still with personality.
- Sharpening: Appropriately sharpen the key parts of the person, such as the eyes, hair, lips, etc., to enhance the clarity and detail expression of the image and make the person more vivid and expressive. However, the degree of sharpening should be moderate to avoid noise or overly hard edges. When processing the portrait of an athlete, I moderately sharpened his sharp eyes and clear muscle lines, making him look more powerful and energetic in the picture.
Portrait photography is a creative process that combines art and technology. From the initial communication with the subject, to the application of light, composition and guidance during the shooting process, and then to the careful post-processing, every link is crucial. Only by carefully grasping every detail can we take portrait works with unique charm that can touch people’s hearts, making each photo an eternal freeze-frame of the subject’s personality and emotion, shining with unique light in the long river of time.