


Well now, let me tell ya, when it comes to takin’ pictures, a good photo ain’t just about the subject, it’s about how you set up them lights too. Ain’t no use havin’ a pretty picture if the light ain’t right, you know? So, if you wanna take better photos, you gotta pay attention to where you put them lights. It’s all about makin’ that light work with your subject, and trust me, it can change the whole feel of a photo.
Why is lightin’ so important in photography? Well, sugar, light is what brings a photo to life. You ever seen a picture look all flat and lifeless? That’s probably ‘cause the light’s been placed wrong. The way light hits your subject, how strong it is, and where it’s comin’ from, it can make all the difference between a dull picture and somethin’ that’ll knock your socks off!
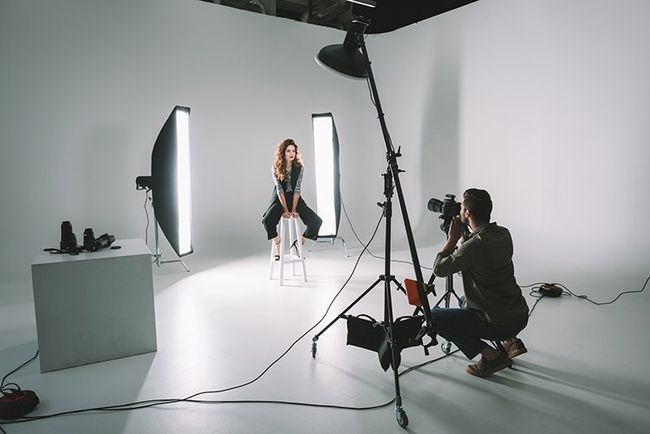
Now, there’s a few things you gotta keep in mind. First, you got three main types of light that you’ll mess with: key light, fill light, and back light. These are the basics, and they all gotta be placed just right to get that perfect shot. The key light is the main light, the one that gives the most light to your subject. The fill light’s there to soften up them shadows, and the back light, well, it helps separate your subject from the background, makin’ everything pop!
Light Position Matters a Lot! Don’t think you can just plop them lights anywhere and hope for the best. It ain’t gonna work like that. The position of the lights can change how the photo feels. For example, if you put the light too high up, your subject might look all dark and spooky, like a shadowy figure. But if you put it too low, well, it’ll look like they just crawled outta the ground, all eerie-like. You gotta find that sweet spot.
When you’re workin’ indoors, especially in a studio, you can control where the light goes more easily. But even outdoors, if you’re usin’ natural light, you gotta think about where the sun’s at. You can move your subject around or adjust the lightin’ setup to make the most of what you’ve got. Sometimes you need a reflector to bounce that sunlight back onto the subject if it’s too harsh, or a diffuser to soften it up a bit.
Positioning for Depth and Mood Another thing to think about is how light affects the mood of your photo. Put that light in the right place, and you can make it look warm and welcoming or dark and moody. If you’re takin’ a portrait, for example, you might wanna position your light a little to the side, like at a 45-degree angle to your subject. That’ll create some nice shadows on their face and add depth, but don’t overdo it or you’ll make them look like they’re in a scary movie!
Also, keep in mind the distance between the light and the subject. If the light’s too far away, it’ll be too soft, and the shadows won’t show up right. But if it’s too close, well, it’ll be too harsh and might make things look too bright and not natural. You gotta play around with the distance to find what looks best.
What About Wall Lights? I’ve heard some folks wonder about wall lights and how high to hang them. Well, as a rule of thumb, wall lights should be around 152-170 cm above the floor. That’s about 5 to 5.5 feet. If you got multiple wall lights, make sure they’re spaced out around 250-300 cm apart—roughly 8 to 10 feet. And, y’know, make sure they’re about eye level. You don’t want to be lookin’ up or down at ‘em too much. Get it right, and them wall lights’ll do wonders.
Experiment with Your Setups Don’t be afraid to try different things! The best photographers know that lightin’ ain’t one-size-fits-all. You gotta experiment with lightin’ ratios, different angles, and distances. Try movin’ the lights around, see what looks best with your subject. Sometimes the smallest change can make the biggest difference.
In the end, it’s all about knowin’ your light and usin’ it to your advantage. Don’t just stick the lights in one spot and hope for the best. Move ‘em around, change ‘em up, and watch how they affect your photo. That’s the secret to great photographs, and once you get the hang of it, you’ll be takin’ pictures like a pro in no time!
Tags:[photography lighting, lighting position, photography tips, lighting techniques, portrait lighting, photography guide]


