


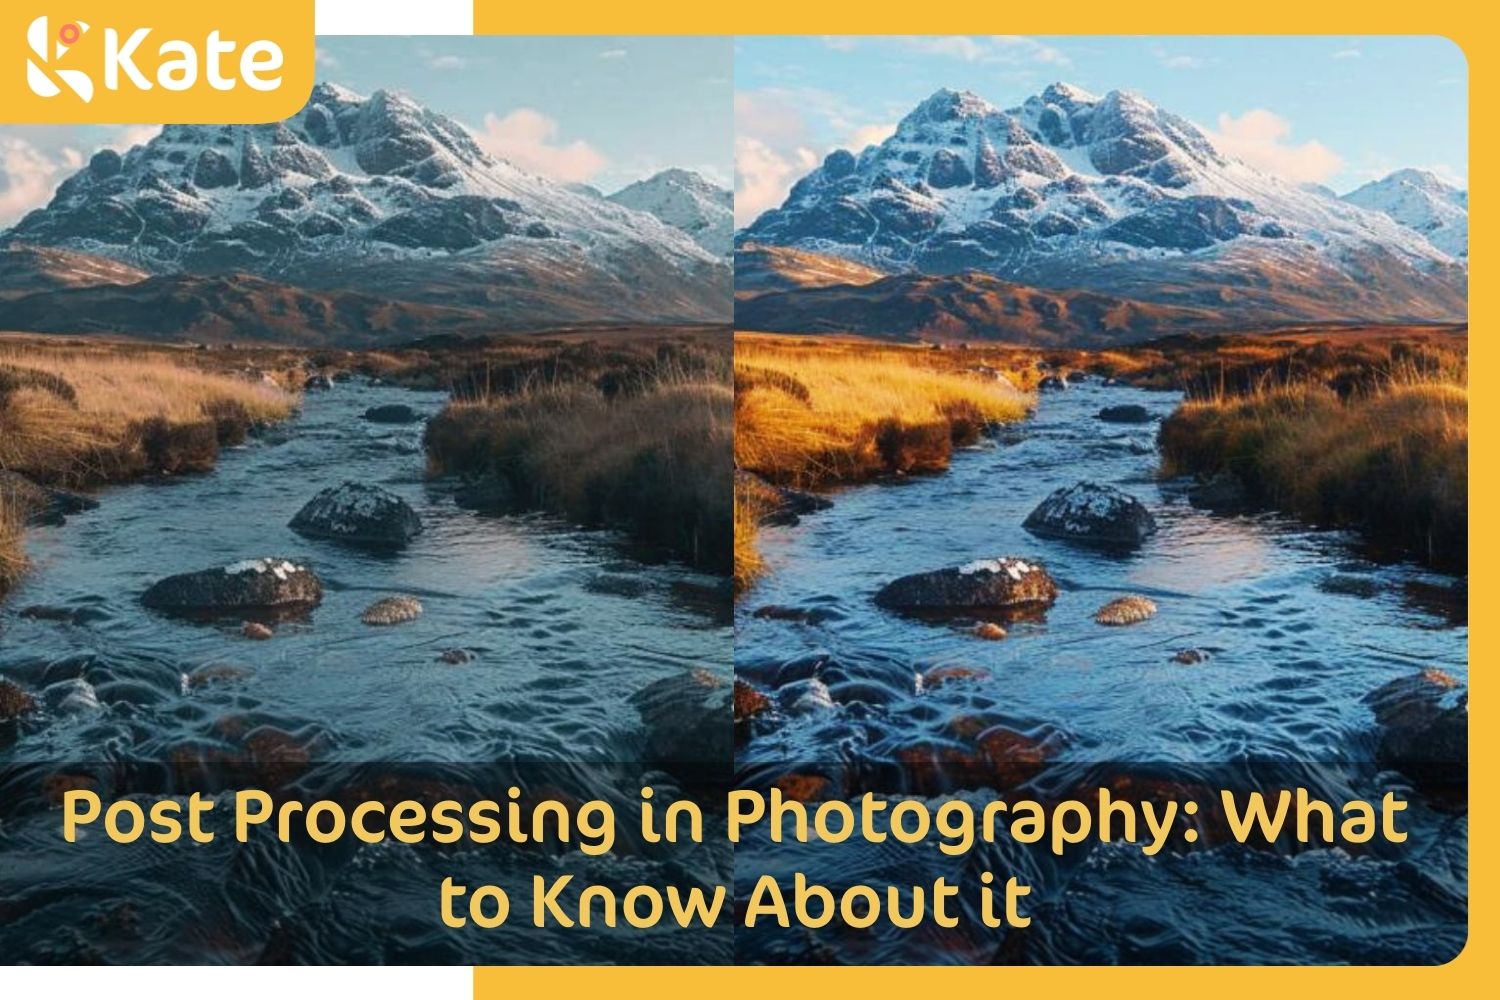
Well now, let me tell ya, if ya wanna make your photos look all crisp and sharp, like them fancy pictures folks hang on their walls, then you gotta know a thing or two about “sharpenin’” them images after you take ’em. See, a camera, even the best ones, ain’t perfect. They make everything look a little soft, like blurry, and that ain’t what we want when we’re showin’ off a good shot. So, we got this thing called image sharpening, and it’s mighty important when it comes to post-processin’ your photos. Don’t matter if you’re usin’ a fancy camera or just your phone, this trick can work wonders.

Now, before I get into the nitty-gritty, let me tell ya, sharpenin’ is just one part of makin’ a photo look good. It ain’t the whole deal. But boy, if ya do it right, it can really bring out the details. You know, all them little things like the wrinkles in an old barn door or the veins on a leaf. Sharpenin’ can make it pop, like it’s alive, right there in front of ya.
Step 1: Why Sharpening Matters
When ya take a photo, the camera ain’t perfect. Sometimes it leaves things a little blurry, and that’s just how it is. If you wanna fix that, sharpenin’ is the way to go. But here’s the kicker, though: too much sharpenin’ can make it look fake. You don’t want it to look all pixelated like a computer mess, ya know? You gotta be careful and not overdo it.
Step 2: Deconvolution Sharpening – What’s That?
Now, there’s somethin’ fancy they call deconvolution sharpenin’. Sounds like a big word, but really it’s just a method to get rid of the blur the camera gives ya. Think of it like this: when you take a picture, the camera makes everything a little fuzzy. Deconvolution sharpening helps to reverse that and make it clearer, sharper. That’s what most folks use when they’re doin’ this post-processin’ work. It gets the details back to where they belong.
Step 3: Other Methods of Sharpening
There are a few other ways folks go about sharpenin’ their images. Some folks like to use things like unsharp maskin’ or high-pass filters. But don’t worry too much about all them fancy names. The point is, you wanna make the image look sharper, but you don’t wanna go too far. If ya make it too sharp, it’ll start lookin’ unnatural, and that’s never a good look. It’s all about findin’ that balance.
Step 4: Software for Sharpening
Now, if you’re wonderin’ what tools ya gotta use for sharpenin’, there are plenty of options out there. You can use programs like Photoshop, Lightroom, or even some free ones like GIMP. They all got features for sharpenin’ up your photos, but each one’s a little different. If you’re new to all this, I’d say start simple, and as you get the hang of it, you can move on to the fancier stuff. The most important thing is to get used to the tools and learn how to use ‘em right.
Step 5: Keepin’ It Subtle
When you’re sharpenin’, remember, less is more. Ya don’t need to sharpen every single pixel. Just focus on the important bits—like the eyes in a portrait or the texture of the wood in a barn. Over-sharpenin’ can make your photo look all messy, like it’s been run through a blender. So, don’t be too eager with the sliders. Take your time and do it bit by bit.
Step 6: Testin’ and Adjustin’ Your Sharpening
One thing I always tell folks is to take a good look at your photo once you’ve sharpened it. Sometimes, after a few minutes, it’s easy to miss things. Step away from the screen for a bit, come back with fresh eyes, and see if it still looks right. You might find you need to tweak it a little more. It’s all about testin’ and adjustin’ until it looks just right.
Step 7: Common Mistakes to Avoid
There are a few common mistakes folks make when sharpenin’. First off, don’t sharpen too much. Like I said, it can look fake. Another thing is to make sure you’re usin’ the right settings for the image. A photo that’s already pretty sharp don’t need as much work as one that’s a little blurry. And lastly, don’t forget to sharpen after you’ve done other edits like exposure or color adjustments. That way, the sharpenin’ will have a clearer effect on the final image.
Conclusion
So, there ya have it. Sharpenin’ your photos is a simple but important part of post-processin’. Whether you’re usin’ a fancy program or somethin’ simpler, it’s all about bringin’ out the best in your image. Don’t rush it. Take your time, and remember, just a little bit goes a long way. Sharpen those photos right, and they’ll look like you spent a lot more time on ‘em than ya actually did.
Tags:[Photography, Image Sharpening, Post Processing, Deconvolution Sharpening, Photo Editing, Photography Techniques, Photo Enhancements, Digital Photography, Sharpening Tips]


